
If you love strawberries and enjoy unique, visually stunning desserts, then the Strawberry Seismic Cake is a must-try. This cake is not just delicious but also an explosion of flavors and textures, making it a standout choice for any special occasion.
But why is it called “Seismic”? The cake has a dynamic, layered look and texture, resembling a seismic wave effect when sliced. With its moist layers, rich strawberry essence, and eye-catching appearance, this cake is bound to impress.
In this article, we will take you through everything you need to know about making the perfect Strawberry Seismic Cake, from the ingredients and recipe to baking tips, decorating ideas, and storage recommendations.
What is a Strawberry Seismic Cake?
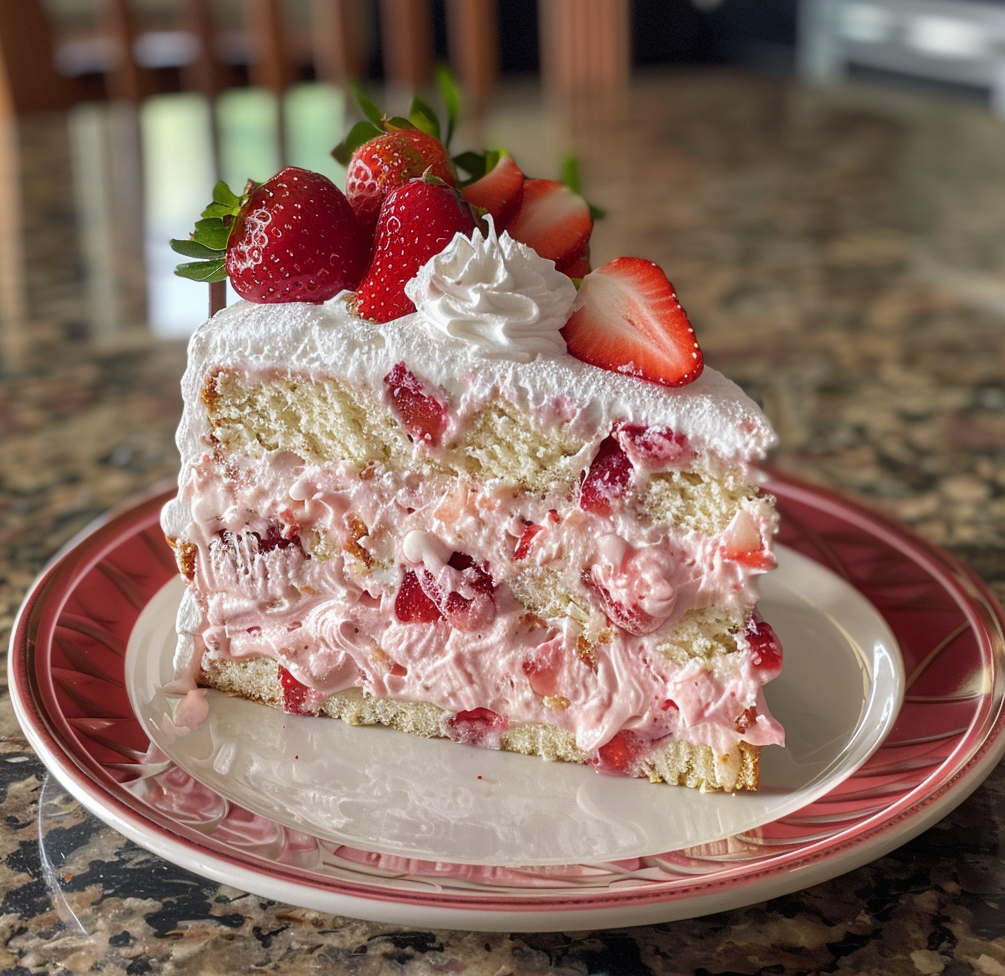
The Strawberry Seismic Cake is a dessert that combines soft, fluffy cake layers with a rich strawberry filling and a creamy topping. What makes it truly unique is the way the layers form during baking, creating a beautiful seismic-like effect that looks as stunning as it tastes.
Why is it Called “Seismic”?
- The cake’s layers shift and settle in an unpredictable yet artistic way, resembling seismic activity.
- The mixture of different textures—soft cake, fruity filling, and creamy topping—adds to the “seismic” sensation with every bite.
This cake is perfect for parties, birthdays, or even just to treat yourself. It’s a fun, Instagram-worthy dessert that will have everyone asking for the recipe!
Ingredients Needed for Strawberry Seismic Cake
Essential Ingredients:
To make this flavorful and textured cake, you will need:
Cake Base:
- 2 ½ cups all-purpose flour
- 1 cup granulated sugar
- 1 teaspoon baking powder
- ½ teaspoon baking soda
- ½ teaspoon salt
- 1 cup unsalted butter (softened)
- 4 large eggs
- 1 teaspoon vanilla extract
- 1 cup buttermilk
Strawberry Filling:
- 2 cups fresh strawberries (diced)
- ½ cup strawberry jam
- ¼ cup sugar
- 1 tablespoon lemon juice
For the Topping:
- 1 cup heavy whipping cream
- ¼ cup powdered sugar
- ½ teaspoon vanilla extract
Optional Add-Ons for Extra Flavor:
- Chocolate chips for a chocolate-strawberry twist
- Chopped nuts for extra crunch
- A splash of rum or liqueur for an adult version
Step-by-Step Recipe to Make Strawberry Seismic Cake
Preparing the Cake Base
- Preheat your oven to 350°F (175°C) and grease a 9-inch cake pan.
- In a bowl, whisk together flour, baking powder, baking soda, and salt.
- In another bowl, beat butter and sugar until light and fluffy.
- Add eggs one at a time, followed by vanilla extract.
- Gradually add the dry ingredients while alternating with buttermilk.
- Pour the batter into the prepared pan and smooth the top.
Preparing the Strawberry Filling
- In a saucepan, combine strawberries, sugar, lemon juice, and jam.
- Cook over medium heat until the strawberries break down and the mixture thickens.
- Allow it to cool before using.
Making the Topping
- In a chilled bowl, beat heavy cream, powdered sugar, and vanilla until stiff peaks form.
Baking and Assembling the Cake
Baking Tips for Perfect Texture
- Do not overmix the batter; it should be light and airy.
- Bake for 30-35 minutes or until a toothpick inserted comes out clean.
- Let the cake cool completely before assembling.
Assembling the Layers
- Slice the cooled cake into two or three layers.
- Spread the strawberry filling evenly between the layers.
- Cover the cake with the whipped cream topping.
Decorating the Strawberry Seismic Cake
The beauty of this cake isn’t just in its flavor but also in its stunning presentation. A well-decorated cake can make it even more appealing for special occasions.
Best Ways to Present the Cake
- Fresh Strawberry Garnish – Arrange sliced or whole strawberries on top for a natural, fruity look.
- Chocolate Drizzle – Drizzle melted chocolate over the cake for an elegant finish.
- Edible Flowers – Adds a sophisticated touch, perfect for a spring or summer celebration.
- Sprinkles or Colored Sugar – A fun option for kids’ parties.
Creative Decoration Ideas
- Layered Strawberry Slices – Arrange thin slices of strawberries in a spiral pattern on top.
- Dusting of Powdered Sugar – Gives the cake a delicate, bakery-style look.
- Gold Leaf Accents – A luxurious touch for weddings or fancy events.
Variations of Strawberry Seismic Cake
If you love experimenting in the kitchen, here are a few delicious variations to try:
Chocolate-Infused Version
- Add ½ cup of cocoa powder to the cake batter for a chocolate-strawberry fusion.
- Use chocolate chips in the filling for an extra indulgent taste.
- Drizzle dark chocolate ganache over the whipped topping.
Nutty and Crunchy Variation
- Add chopped almonds, walnuts, or pecans to the batter for extra crunch.
- Sprinkle toasted coconut flakes on top for a tropical touch.
- Use hazelnut cream instead of whipped cream for a richer flavor.
Health Benefits of Strawberries in Your Cake
Strawberries aren’t just delicious—they’re also packed with health benefits. Adding them to your cake makes it a slightly healthier treat!
Nutritional Value of Strawberries
- Rich in Vitamin C – Supports a healthy immune system.
- Loaded with Antioxidants – Helps fight free radicals in the body.
- Good Source of Fiber – Aids digestion and promotes gut health.
- Low in Calories – A naturally sweet but diet-friendly fruit.
Why Strawberries Are a Great Addition
- They add natural sweetness, reducing the need for extra sugar.
- Their juicy texture keeps the cake moist.
- They provide a refreshing balance to the richness of the cake.
Common Mistakes to Avoid When Making This Cake
Even the best bakers can run into issues when making a layered cake. Here are some common mistakes and how to avoid them:
1. Overmixing the Batter
- Overmixing can make the cake dense instead of fluffy. Mix just until ingredients are combined.
2. Using Overripe or Underripe Strawberries
- Overripe strawberries can be too mushy, while underripe ones may lack sweetness. Use firm, ripe strawberries for the best texture and taste.
3. Not Letting the Cake Cool Before Assembling
- Assembling a warm cake with cream will cause it to melt and slide. Cool completely before layering.
4. Skipping the Chill Time
- After assembling, let the cake chill in the fridge for at least an hour to help the flavors blend.
Serving Suggestions for Strawberry Seismic Cake
Wondering how to serve this cake for the best experience? Here are some ideas:
Best Pairings with Beverages
- Tea or Coffee – A warm cup of tea or coffee balances the cake’s sweetness.
- Champagne or Sparkling Wine – Perfect for an elegant celebration.
- Strawberry Milkshake – A kid-friendly, double strawberry treat!
Ideal Occasions to Serve
- Birthdays – A fun and colorful option for celebrations.
- Valentine’s Day – A romantic dessert for a special night.
- Summer Picnics – Light, fruity, and refreshing on a warm day.
Storage and Shelf Life
To keep your cake fresh and delicious, follow these storage tips:
How to Store It Properly
- Refrigeration: Store in an airtight container in the fridge for up to 4 days.
- Freezing: You can freeze the cake (without the topping) for up to 2 months. Thaw before adding the whipped cream.
How Long It Lasts
- At room temperature: Not recommended due to the cream topping.
- In the fridge: Best consumed within 3-4 days.
Strawberry Seismic Cake for Special Occasions
This cake is perfect for any special occasion and can be customized in different ways:
Perfect for Birthdays and Holidays
- Use colorful sprinkles for a birthday-themed cake.
- Add festive decorations for Christmas, Easter, or Thanksgiving.
Customizing for Special Events
- For weddings – Decorate with white chocolate and edible pearls.
- For baby showers – Add blue or pink decorations.
Why You’ll Love This Cake
If you’re looking for a dessert that is:
Delicious and visually stunning
Perfectly balanced in flavor and texture
Fun and unique to make
Then the Strawberry Seismic Cake is the perfect choice!
Reviews from Those Who Tried It
- “This cake is absolutely amazing! The strawberry flavor is so fresh, and the texture is perfect!” – Sarah L.
- “A showstopper dessert! I made it for a family gathering, and everyone loved it.” – James M.
- “Fun to make and even more fun to eat. Highly recommend!” – Emily R.
Frequently Asked Questions (FAQs)
1. Can I use frozen strawberries instead of fresh ones?
Yes, but thaw and drain them first to prevent excess moisture in the filling.
2. Can I make this cake in advance?
Yes! You can bake the cake a day ahead and assemble it before serving.
3. Can I use a different fruit instead of strawberries?
Absolutely! Raspberries, blueberries, or mixed berries work well too.
4. What can I use instead of whipped cream for the topping?
You can use cream cheese frosting, buttercream, or even Greek yogurt for a lighter version.
5. How do I prevent my cake from becoming too soggy?
Make sure the strawberry filling is thickened properly and allow the cake layers to cool before assembling.
Conclusion
The Strawberry Seismic Cake is a delightful, flavorful, and visually stunning dessert that will impress your family and friends. With its moist cake layers, rich strawberry filling, and creamy topping, it’s an absolute treat for any occasion.
Print
Strawberry Seismic Cake
- Total Time: 55 minutes
- Yield: 10 servings 1x
- Diet: Vegetarian
Description
The Strawberry Seismic Cake is a visually stunning and irresistibly delicious dessert that combines soft cake layers with a rich strawberry filling and a luscious whipped topping. The unique “seismic” effect in the layers makes it a standout treat for any celebration. Whether you’re a beginner or an experienced baker, this recipe is easy to follow and guaranteed to impress!
Ingredients
For the Cake Base:
- 2 ½ cups all-purpose flour
- 1 cup granulated sugar
- 1 teaspoon baking powder
- ½ teaspoon baking soda
- ½ teaspoon salt
- 1 cup unsalted butter (softened)
- 4 large eggs
- 1 teaspoon vanilla extract
- 1 cup buttermilk
For the Strawberry Filling:
- 2 cups fresh strawberries (diced)
- ½ cup strawberry jam
- ¼ cup sugar
- 1 tablespoon lemon juice
For the Topping:
- 1 cup heavy whipping cream
- ¼ cup powdered sugar
- ½ teaspoon vanilla extract
Optional Add-Ons:
- ½ cup chocolate chips for a chocolate-strawberry twist
- Chopped almonds or walnuts for added crunch
- Toasted coconut flakes for a tropical touch
Instructions
Step 1: Preparing the Cake Base
- Preheat your oven to 350°F (175°C) and grease a 9-inch cake pan.
- In a bowl, whisk together flour, baking powder, baking soda, and salt.
- In another bowl, beat butter and sugar until light and fluffy.
- Add eggs one at a time, mixing well after each addition. Stir in vanilla extract.
- Gradually add the dry ingredients, alternating with buttermilk, until fully combined.
- Pour the batter into the cake pan and smooth the top.
- Bake for 30-35 minutes, or until a toothpick inserted in the center comes out clean.
- Let the cake cool completely before slicing.
Step 2: Making the Strawberry Filling
- In a saucepan, combine strawberries, sugar, lemon juice, and strawberry jam.
- Cook over medium heat until the strawberries break down and thicken.
- Let the mixture cool before spreading it on the cake.
Step 3: Preparing the Whipped Topping
- In a chilled bowl, beat heavy cream, powdered sugar, and vanilla extract until stiff peaks form.
Step 4: Assembling the Cake
- Slice the cooled cake into two or three layers.
- Spread strawberry filling evenly between the layers.
- Cover the cake with whipped topping and smooth it out.
- Garnish with fresh strawberries, chocolate drizzle, or nuts.
Step 5: Chilling and Serving
- Refrigerate the cake for at least 1 hour before serving to enhance flavors.
- Slice and enjoy!
Notes
Don’t overmix the batter – it should be light and airy.
Use ripe strawberries for the best flavor and texture.
Let the cake cool completely before assembling to prevent the filling from melting.
Chill the cake before serving for a firmer texture and richer taste.
Experiment with toppings like chocolate, nuts, or edible flowers for extra flair!
- Prep Time: 20 minutes
- Cook Time: 35 minutes