
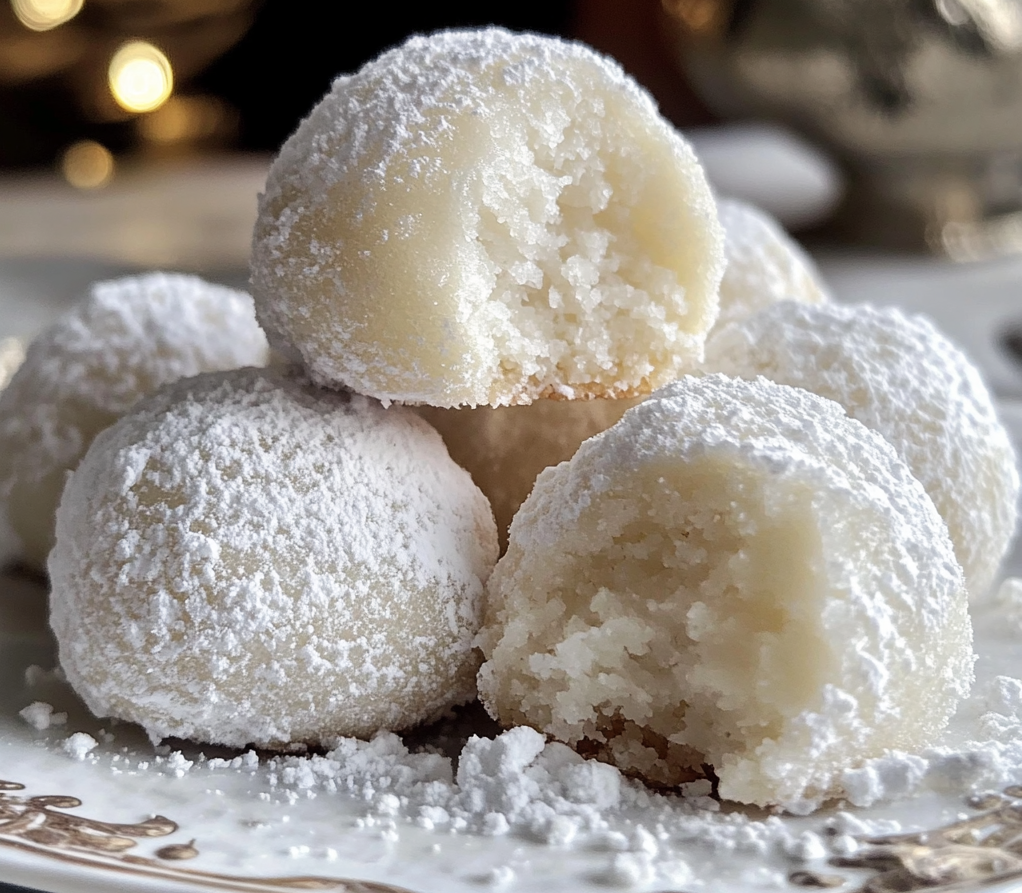
If you love delicate, melt-in-your-mouth cookies that are dusted with powdered sugar and packed with a rich buttery flavor, then milk snowball cookies are a must-try! These delightful treats, often associated with holiday celebrations, are known for their soft texture and irresistible sweetness.
Perfect for pairing with a warm cup of milk, coffee, or tea, these cookies are incredibly easy to make and require just a few simple ingredients. Whether you’re baking them for a festive gathering, as a homemade gift, or simply to satisfy your sweet tooth, milk snowball cookies will quickly become one of your favorite treats.
What Are Milk Snowball Cookies?
Milk snowball cookies belong to the family of shortbread-like cookies, often coated in powdered sugar, giving them their signature snowy appearance. Unlike traditional snowball cookies that are typically made with just butter and flour, this version incorporates milk, adding extra richness and a slightly softer texture.
They are often bite-sized, with a crumbly yet tender interior that melts effortlessly in your mouth. These cookies are versatile and can be customized with nuts, chocolate chips, or even a hint of vanilla or almond extract for added flavor.
The History of Snowball Cookies
Snowball cookies, also known as Mexican Wedding Cookies, Russian Tea Cakes, or Butterballs, have a rich and diverse history. They have been a staple in various cultures for centuries, often served at weddings, Christmas gatherings, and other special occasions.
Their buttery, nutty texture and powdered sugar coating make them a festive favorite, especially during the winter season. The exact origin of snowball cookies is unclear, but they are believed to have European roots, later spreading across different continents where they were adapted with regional ingredients.
Today, these cookies are beloved worldwide and remain a go-to holiday treat for many families.
Key Ingredients for Milk Snowball Cookies
To make perfectly soft and flavorful milk snowball cookies, you’ll need a handful of essential ingredients:
- All-Purpose Flour – Forms the base of the cookie and gives structure.
- Butter – Provides richness and a tender texture.
- Milk – The special ingredient that enhances moisture and softness.
- Powdered Sugar – Used for both sweetness and the classic snowy coating.
- Vanilla Extract – Adds warmth and depth of flavor.
- Salt – Balances the sweetness and enhances taste.
- Optional Additions: Chopped nuts (walnuts, pecans), chocolate chips, or cinnamon for extra flavor.
Step-by-Step Recipe: How to Make Milk Snowball Cookies
Ingredients:
- 2 cups all-purpose flour
- 1 cup unsalted butter, softened
- ½ cup powdered sugar (plus extra for coating)
- ¼ cup milk
- 1 tsp vanilla extract
- ½ tsp salt
- ½ cup finely chopped nuts (optional)
Instructions:
- Preheat oven to 350°F (175°C) and line a baking sheet with parchment paper.
- In a large mixing bowl, cream butter and powdered sugar together until light and fluffy.
- Add in milk and vanilla extract, mixing until well combined.
- Gradually stir in flour and salt, mixing until a soft dough forms. If using nuts, fold them in at this stage.
- Shape the dough into small balls (about 1 inch in diameter) and place them on the baking sheet.
- Bake for 12-15 minutes, or until the cookies are lightly golden at the bottom.
- Let the cookies cool for 5 minutes, then roll them in powdered sugar while still warm.
- Allow to cool completely before rolling in powdered sugar again for a perfect snow-like coating.
These cookies are best enjoyed fresh but can be stored for later indulgence!
Baking Tips for the Perfect Snowball Cookies
Want to ensure your milk snowball cookies turn out flawless every time? Here are some expert tips:
- Use room-temperature butter for easier mixing and a smoother dough.
- Don’t overmix the dough—this will keep the cookies tender rather than tough.
- Chill the dough for about 30 minutes if it’s too sticky to handle.
- Roll cookies twice in powdered sugar for the ultimate snowball effect.
- Allow cookies to cool properly before the second sugar coating to prevent melting.
Variations and Flavor Enhancements
One of the best things about milk snowball cookies is their versatility. You can tweak the basic recipe to create exciting new flavors while maintaining the classic melt-in-your-mouth texture.
Flavor Variations:
- Chocolate Snowball Cookies – Add ¼ cup of cocoa powder to the dough for a rich, chocolatey version.
- Nutty Delight – Fold in finely chopped pecans, walnuts, or almonds for a crunchier texture.
- Coconut Snowballs – Mix in ½ cup shredded coconut for a tropical twist.
- Cinnamon Spice – Add ½ teaspoon of cinnamon and a pinch of nutmeg for a warm, spiced flavor.
- Lemon Snowball Cookies – Include 1 teaspoon of lemon zest for a refreshing citrus kick.
You can also dip them in melted chocolate or drizzle caramel over them for an extra touch of indulgence.
Storing and Preserving Milk Snowball Cookies
To keep your milk snowball cookies fresh and delicious for as long as possible, follow these storage tips:
Short-Term Storage (1-2 Weeks):
- Store cookies in an airtight container at room temperature.
- Place parchment paper between layers to prevent sticking.
Long-Term Storage (Up to 3 Months):
- Store in the freezer in an airtight container or freezer bag.
- When ready to eat, allow them to thaw at room temperature for about 15 minutes.
Pro Tip: If the powdered sugar absorbs moisture over time, simply re-roll the cookies in fresh sugar before serving.
Serving Suggestions and Pairings
These delicate cookies pair beautifully with various drinks and desserts.
Best Beverage Pairings:
- Hot chocolate – The perfect holiday duo!
- Coffee or espresso – The slight bitterness complements the sweetness of the cookies.
- Chai tea – The warm spices blend well with the buttery texture.
- Cold milk – A classic, comforting choice.
Creative Ways to Serve:
- Arrange them on a festive cookie platter with other holiday treats.
- Serve with a side of fruit compote or jam for an extra burst of flavor.
- Crumble them over vanilla ice cream for a delicious topping.
Why Milk Snowball Cookies Are Great for Holidays and Special Occasions
Milk snowball cookies are not just tasty; they also bring a sense of nostalgia and tradition to any celebration.
Why They’re a Holiday Favorite:
- Their powdered sugar coating makes them look like mini snowballs, perfect for winter festivities.
- They are easy to make in large batches, making them ideal for holiday parties.
- They are great gifts—simply place them in a decorative tin or mason jar with a festive ribbon.
These cookies are a staple for Christmas, weddings, birthdays, and tea parties. Their buttery texture and delicate sweetness make them universally loved.
Gluten-Free and Vegan Alternatives
For those with dietary restrictions, you can easily modify the recipe to make gluten-free or vegan snowball cookies without compromising on taste.
Gluten-Free Version:
- Use gluten-free all-purpose flour instead of regular flour.
- Ensure that all ingredients, including vanilla extract, are certified gluten-free.
Vegan-Friendly Swaps:
- Replace butter with vegan butter or coconut oil.
- Use plant-based milk (like almond, oat, or soy) instead of regular milk.
These adjustments will still result in tender, delicious cookies with the same snowy charm.
Nutritional Information
While milk snowball cookies are a sweet indulgence, it’s helpful to know their nutritional value.
| Nutrient | Amount per Cookie |
|---|---|
| Calories | ~120 kcal |
| Carbohydrates | ~14g |
| Sugar | ~6g |
| Fat | ~7g |
| Protein | ~1.5g |
| Sodium | ~40mg |
For a healthier alternative, you can:
- Reduce the sugar and replace it with a natural sweetener.
- Use whole wheat flour instead of all-purpose flour for added fiber.
- Swap butter for Greek yogurt for a lower-fat option.
Frequently Asked Questions
1. Why did my snowball cookies turn out too dry?
Overbaking or adding too much flour can result in dry cookies. Make sure to measure ingredients accurately and bake until just lightly golden.
2. Can I use margarine instead of butter?
Yes, but the flavor and texture might differ slightly. Butter provides a richer taste and better consistency.
3. Can I make the dough ahead of time?
Absolutely! The dough can be stored in the refrigerator for up to 3 days or frozen for up to 2 months.
4. Do I have to roll them in powdered sugar twice?
Rolling them twice enhances the snowy appearance and ensures a sweeter finish. The first coating sticks better while they are warm, and the second makes them extra beautiful.
5. Can I use almond or oat flour instead of all-purpose flour?
Yes, but it may change the texture. Almond flour adds a nutty flavor, while oat flour makes them softer and more delicate.
Milk snowball cookies are a timeless classic, offering a rich, buttery flavor and a melt-in-your-mouth texture that makes them perfect for any occasion. Whether you’re baking them for the holidays, a cozy weekend treat, or as a thoughtful homemade gift, these cookies are sure to impress.
With their simple ingredients, easy preparation, and versatile flavors, you’ll find yourself making them over and over again. Give this recipe a try, and let these delicate snowball cookies become a staple in your home!
Print
Milk Snowball Cookies
- Total Time: 30 minutes
- Yield: 24 cookies 1x
Description
If you love delicate, melt-in-your-mouth cookies that are dusted with powdered sugar and packed with a rich buttery flavor, then milk snowball cookies are a must-try! These delightful treats, often associated with holiday celebrations, are known for their soft texture and irresistible sweetness.
Ingredients
For the Cookies:
- 2 cups all-purpose flour
- 1 cup unsalted butter, softened
- ½ cup powdered sugar (plus extra for rolling)
- ¼ cup milk
- 1 teaspoon vanilla extract
- ½ teaspoon salt
- ½ cup finely chopped nuts (optional)
For Rolling:
- ½ cup powdered sugar
Instructions
- Preheat oven to 350°F (175°C) and line a baking sheet with parchment paper.
- In a mixing bowl, cream butter and powdered sugar together until light and fluffy.
- Add in milk and vanilla extract, mixing until well combined.
- Gradually stir in flour and salt, mixing until a soft dough forms. If using nuts, fold them in at this stage.
- Roll the dough into 1-inch balls and place them on the baking sheet.
- Bake for 12-15 minutes, or until the cookies are lightly golden on the bottom.
- Let cookies cool for 5 minutes, then roll them in powdered sugar while still warm.
- Once completely cooled, roll them in powdered sugar again for a perfect snowball effect.
Notes
- Use room-temperature butter for a smoother dough and even baking.
- Chill the dough for 30 minutes if it’s too sticky to roll.
- Don’t overbake—the cookies should remain soft and tender.
- Double coat in powdered sugar for a perfect snowy look and extra sweetness.
- Store in an airtight container to keep them fresh for up to 2 weeks.
- Prep Time: 15 minutes
- Cook Time: 15 minutes